
Most engineering disciplines specialize around a domain. Engineers trained in that field speak the same language as the people requesting them to build a system. In contrast, software developers need to learn the language of the domain. This makes it harder to elicit requirements.
Subject-matter experts (SMEs), by definition, are experts. They’ve accumulated a lot of knowledge over a long period of time. It’s hard for them to think back to when they didn’t have all that knowledge. This makes it hard for them to know what to explain or not, and even what to mention at all. And since the business analyst is new to the domain, they don’t know what questions to ask. The result is an iterative process that takes a lot of time to get things right.
Worse, it’s uncommon for SMEs to be experts in the entire domain. More often, multiple SMEs each have a clear picture of one part of the process and nobody of the whole. This results in conflicting points of view, which need resolution before building software. However, it takes a while before the analyst knows enough to ask the hard questions and bring conflicts into the open.
Event storming is a technique that solves these issues. It’s a workshop where the key stakeholders work together to build up a consistent picture of the entire process under consideration.
In event storming, the SMEs perform the integration of various perspectives rather than the business analyst. By giving them a standard notation, non-experts can follow what they’re doing and force them to be precise. It allows them to ask the hard questions and bring conflicts out for resolution. Everybody’s learning compresses while the domain model emerges as a natural byproduct.
Event storming use the following concepts:
- A domain event is anything that happens that’s of interest to an SME. (orange)
- A command triggers an event. (blue)
- An aggregate accepts commands and emits events. (yellow)
- A policy contains the decision on how to react to an event. (purple)
- A read model holds the information necessary to make a decision. (green)
- A person is a human being responsible for a given decision. (yellow)
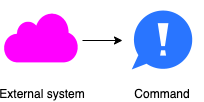
- An external system is another system that interacts with the system under consideration. (pink)
In an event storming workshop, sticky notes of a particular color represent each of these concepts. Workshop participants place the stickies on a wall in timeline order to visualize the business process.
A specific grammar governs event storming concepts, in the sense that certain items always come before or after others. It’s this grammar that allows people who aren’t domain experts to ask intelligent questions, like what command leads to this event, and who issues it?
I like event storming, because it employs useful concepts, like domain events, that are non-technical and yet naturally map to technical concepts, like messages published to a message broker. As such, the output of the workshop is useful long after the workshop is over.
That raises the question of how best to use that output. During the workshop, using stickies makes a lot of sense to facilitate interaction. Afterwards, however, a bit more formal notation would be nice.
I created a set of icons that represent the event storming concepts. These icons maintain the colors of the stickies, but add symbols to visually represent the concepts. Here’s the event storming grammar visualized using these icons:
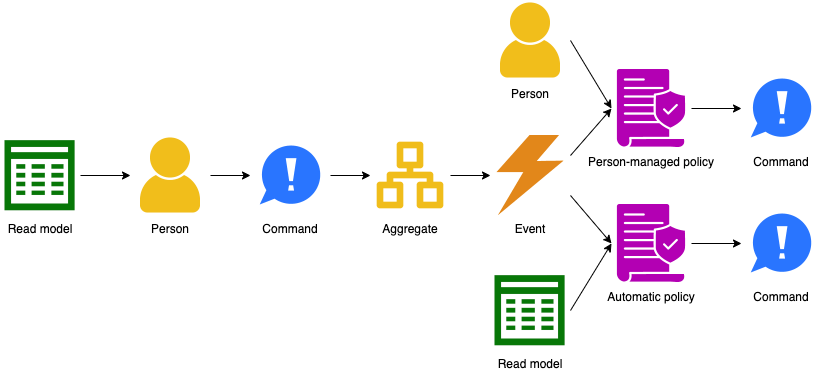

I’ve used these icons to document processes in a way that both techies and non-techies can follow. The icons are released under the Creative Commons By Attribution 4.0 International license, so feel free to use them in your own work.
 There is a lot of interest in REST APIs these days. Unfortunately, most APIs I see are not very
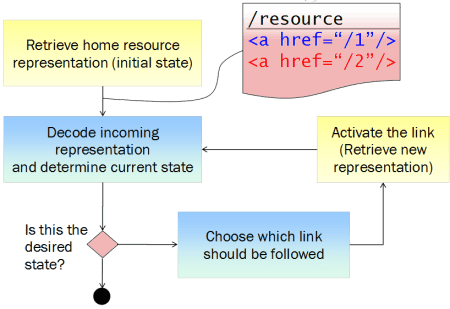

 When extending an existing design, you should stick with the already selected media types.
 In order to help developers build clients that work against your API, you will most likely want to add some documentation that explains certain more subtle points.
You must be logged in to post a comment.